
I can’t believe we’re already creeping up to summer time! Today was a gorgeous, bright and lightly breezy day, and I am anxious to spend more time outside with my kids!
My family almost always wear sunscreen when we are outside, because we have fair skin and burn (and freckle) easily. However, sometimes I have been known to get a sunburn through the sunscreen, and there have been other occasions where I frankly forgot. Suffice it to say, I am no stranger to sunburns.
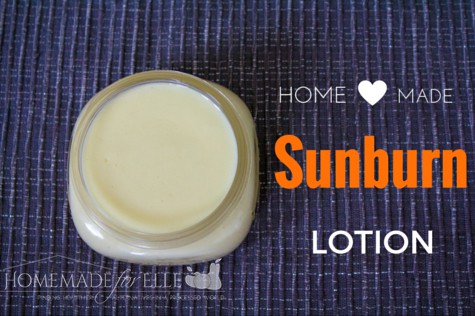
I have used quite a few commercial sunburn products over the years, but since I now make almost all of my own skin moisturizers, I figured I would make homemade sunburn lotion to keep on hand for this summer, should anyone in my family need it!
Table of Contents
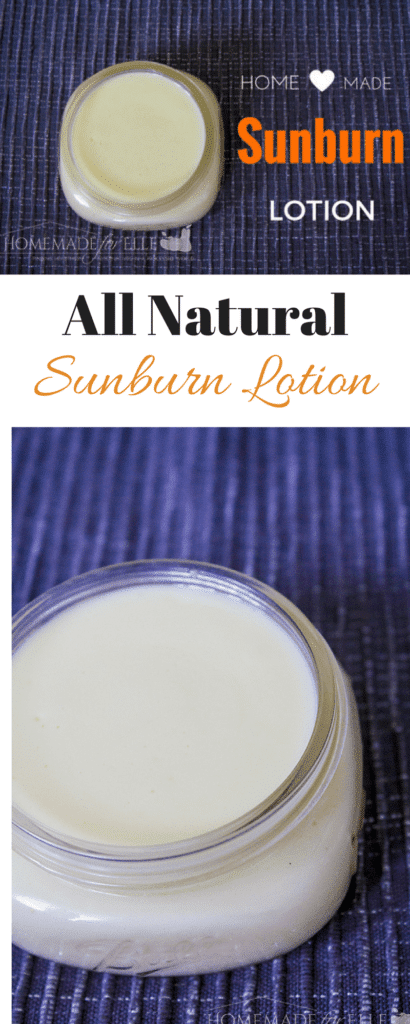
Homemade Sunburn Lotion
Makes 2 cups of sunburn lotion. Affiliate links added for reference.
- 1/8 cup beeswax (I buy this kind)
- 1/3 cup coconut oil
- 1/4 cup grapeseed oil (also sub avocado, almond or olive oil)
- 1 cup shea butter
- 1 tbsp. aloe vera gel
- 20 drops lavender essential oil
That’s it! This homemade sunburn lotion is soothing, creamy and moisturizing and will feel heavenly on sunburned skin. The addition of natural oils will keep your skin hydrated and may help prevent peeling. Aloe vera gel has been used for more than 6,000 years, dating back to early Egypt, and is great for burns.
This lotion is great for an everyday moisturizer too, so don’t feel like you have to store it for a special occasion! I also have a great recipe for a lavender body lotion, if you want to check it out!
NOTE: This also doubles as a great diaper rash cream! I had this in my son’s bedroom one day, and couldn’t locate my other all natural diaper cream, so I applied some to his rash. It worked great! His rash was completely cleared up overnight.
Printable Recipe for Homemade Sunburn Lotion
Here is a printable version so you can print it out and hang it on your fridge, or share it with a friend!
Homemade Sunburn Lotion
A quick and easy recipe for all natural sunburn lotion.
Ingredients
- 1/8 cup beeswax
- 1/3 cup coconut oil
- 1/4 cup grapeseed oil also sub avocado, almond or olive oil
- 1 cup shea butter
- 1 tbsp. aloe vera gel
- 20 drops lavender essential oil
Instructions
-
Add 2" of water to a small pot, and bring to a boil. Place a heat-proof glass bowl on top, and add beeswax, coconut oil, grapeseed oil, and shea butter. Reduce heat to medium and simmer until melted, about 10 - 15 minutes. Remove from heat and add in aloe vera gel and lavender essential oil, stir well to combine.
-
Place in the freezer for 20 - 30 minutes, until almost solidified. Transfer mixture to a blender and process until whipped and creamy, which takes 1 - 5 minutes, depending on your blender.
Buy Homemade Sunburn Lotion
If you want to try this sunburn lotion, but don’t want to make it yourself, I’ve got you covered! You can purchase this handcrafted item from my Etsy store 🙂
Other Summer Fun
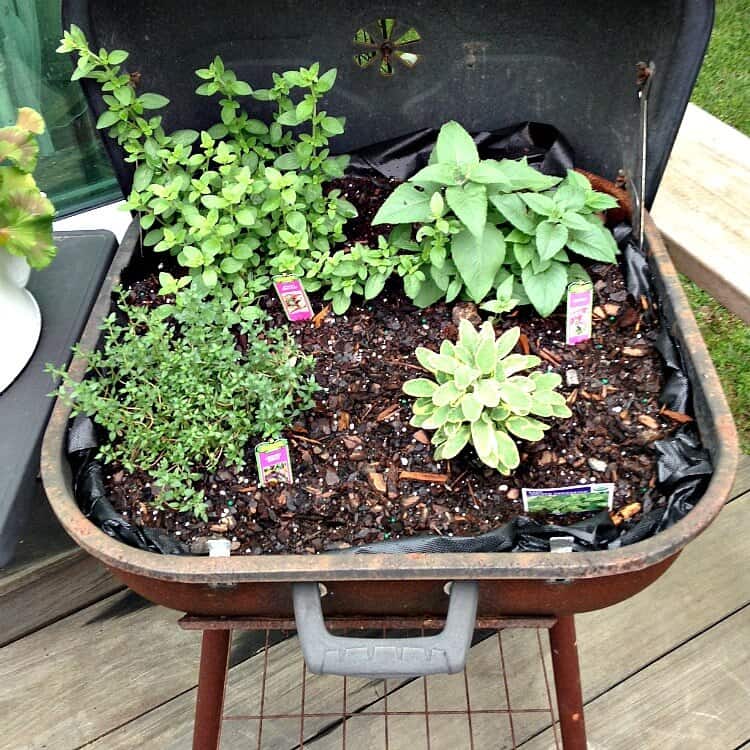
If you are in the mood to celebrate the season, I have a few other posts to share with you! My friend Cynthia at Feeding Big shared a post on how to turn a grill into a herb garden. Isn’t this so fun?! I love upcycle projects, especially when they involves yummy herbs!
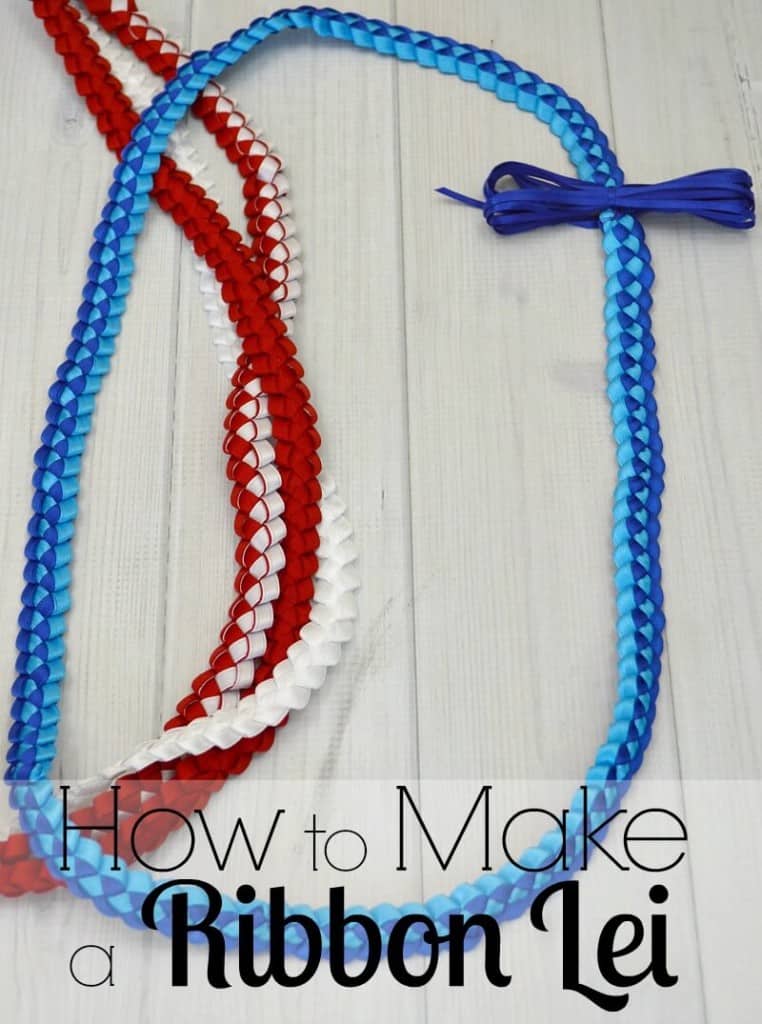
If you’re planning on throwing a luau this summer, you can learn how to make a ribbon lei from my friend Susan at Organized31. These are so fun, and a perfect party gift to give!
Pin it:
I just wanted to let you know that the Shea butter link sends you to a “snoring solution” on Amazon, haha.
Excited to try this recipe!
Thanks for letting me know, Brittany <3
Oh my goodness..I didn’t even know this existed. I live in Florida so I will definitely be using this, for sure! Thanks so much!
We don’t often have enough sun and heat to burn here, but I’m pinning this with the hope that the weather will change and I’ll be prepared!
I am like you, I burn easily, so having a lotion like this would be so great. I think it is so important to put natural lotions on our body and keep the chemicals that are in most store bought items away from our skin. Thanks for sharing how to do this – I feel confident that I can make it.
I’m definitely going to make some of this for summer. Thanks for the video of the steps – will make it so much easier to follow.